


Diesel Bunk Heater Install for Semi Trucks: A Practical Step-by-Step Guide
|
Time to read 3 min
|
Time to read 3 min
Cold nights on the road make a diesel heater one of the best upgrades for any semi. A diesel heater reduces idling, saves fuel, and pays for itself fast. This guide walks through choosing a certified unit, what comes in a typical kit, fitment tips, wiring, fuel plumbing, and testing. It covers the install details I use every time so you can approach the job confidently.
Return on investment is very, very quick. A small diesel heater can cut hours of engine idling each week, lower fuel costs, and reduce wear on the engine. Because these heaters draw very little electrical power, they are ideal for owner-operators and fleet trucks that need efficient overnight heat without running the main engine.
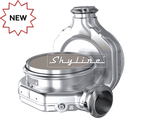
A quality diesel heater kit usually includes the heater unit, intake and exhaust piping, a fuel pump, fuel lines, clamps, a mounting plate, a control panel, and a complete wiring harness with a fused lead. Look for certifications and a warranty; CE certification and a two-year manufacturer warranty are common on reputable units.
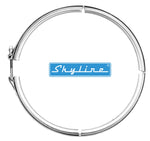
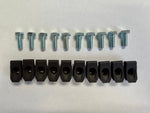
Before drilling, check the sleeper for factory holes. Many Kenworth, Volvo, and International sleepers already include openings for bunk heaters. If there are no pre-cut holes, use a 4-inch hole saw and the supplied mounting plate. Always use silicone around the plate and stainless self-tapping screws with rubber washers to seal the floor.
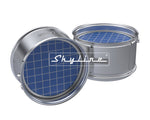
Most kits use a screen-style pickup that mounts inside the tank. Avoid inline filters in extreme cold because they can gel and block fuel flow. The in-tank screen prevents large debris while minimizing cold-weather issues.
Use the supplied fuse holder and crimp proper terminals on the power leads. If the truck has an inverter, piggybacking on the inverter battery leads is a clean option and keeps the fuse inside the cab for easier access. Run the harness under the bunk mat or along factory harness routes, bundle excess wire, and protect everything with proper loom and zip ties
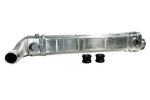
Mount the heater with the supplied bolts and confirm the intake and exhaust are fully seated and clamped tight. Route the fuel line away from the exhaust and secure it to frame crossmembers using existing harness points, zip ties, or riveted rubber grommets. Tight hose clamps help prevent air intrusion into the fuel run — air is the enemy of reliable starting.
Use the panel’s fast-pump or prime mode to purge air from the lines. Watch the clear fuel line for steady flow without bubbles. A one-minute prime is usually sufficient. Set the thermostat in automatic mode and allow a few minutes for initial smoking to clear; fresh units often burn off manufacturing residues for a short period.
A professional install typically takes about one to two hours when replacing an existing unit and a bit longer if new holes and pipe stands are required. Selecting a certified, supported unit with spare parts availability and a warranty will protect both safety and investment. With correct installation and a few basic checks, a diesel heater is an efficient way to reduce idling and keep the bunk comfortable through winter.